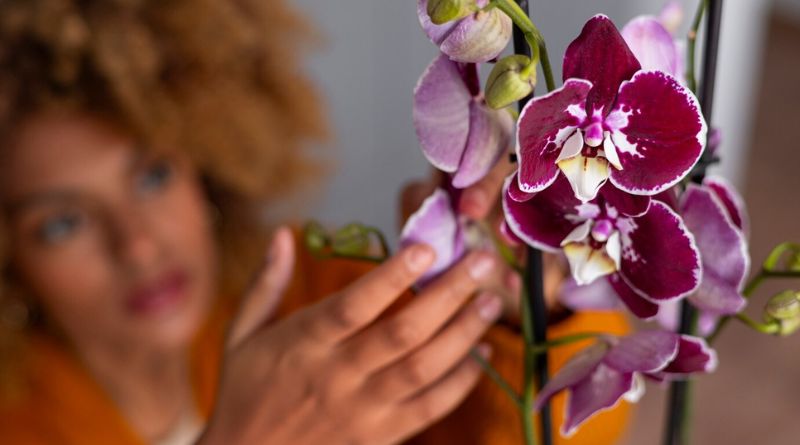
Reasons Orchid Leaves Turn Yellow – Healthy orchid leaves are essential indicators of a thriving plant, making any deviation, such as yellowing, a cause for concern. Yellowing leaves in orchids can signal various issues ranging from improper care practices to environmental stressors.
Understanding the reasons behind this discoloration is crucial for maintaining the overall well-being of the orchid. Factors like overwatering, underwatering, inadequate light, environmental conditions, diseases, and pests can contribute to leaf yellowing. Proper diagnosis techniques, including visual inspection, root examination, and environmental assessment, aid in pinpointing the underlying cause.
This guide aims to explore these factors, offer effective diagnostic approaches, and provide preventive measures and treatments to restore orchids to a state of optimal health. By implementing these strategies, orchid enthusiasts can ensure vibrant, green foliage, fostering a thriving and visually appealing orchid display.
Importance of healthy orchid leaves
Healthy orchid leaves are vital indicators of a plant’s overall well-being and are integral to its growth and vitality. The importance of maintaining robust, green foliage in orchids lies in several key aspects:
- Photosynthesis: Orchid leaves play a crucial role in the process of photosynthesis, where they absorb light energy and convert it into essential nutrients for the plant. Healthy leaves ensure efficient photosynthesis, providing the orchid with the energy it needs for growth, flowering, and overall development.
- Nutrient Absorption: Orchid leaves act as nutrient absorbers, taking in essential elements from the environment and facilitating their transportation throughout the plant. Healthy leaves optimize nutrient uptake, contributing to the orchid’s strength and resilience.
- Water Regulation: The condition of orchid leaves is closely tied to the plant’s water balance. Healthy leaves help regulate water absorption and loss, preventing issues such as dehydration or waterlogging, which can adversely affect the orchid’s health.
- Aesthetic Appeal: Vibrant, green leaves enhance the visual appeal of orchids. Healthy foliage is not only an indication of the plant’s vigor but also adds to the overall beauty of the orchid, making it more enjoyable for enthusiasts and observers.
- Disease and Pest Resistance: Healthy leaves are better equipped to resist diseases and repel pests. They provide a robust defense against pathogens and insects, reducing the likelihood of infections that can compromise the orchid’s health.
- Indicator of Plant Health: Changes in leaf color, such as yellowing, can serve as early warning signs of underlying issues. Regularly monitoring the condition of orchid leaves allows growers to identify and address problems promptly, preventing further deterioration.
Also, Read – Reasons Alabama Summers Are the Best
Reasons Orchid Leaves Turn Yellow
Overwatering
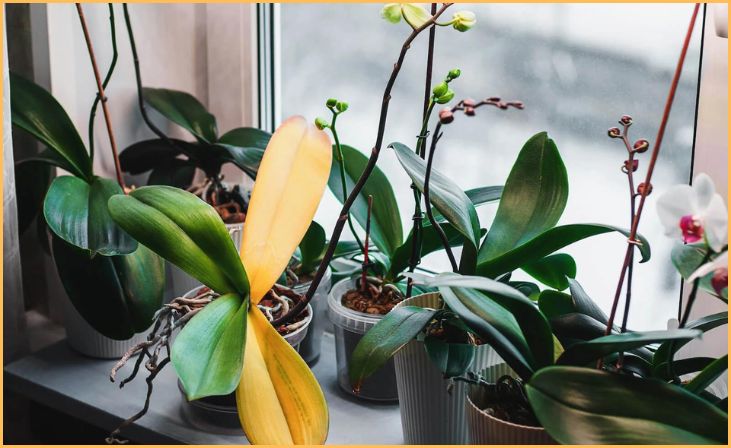
Overwatering orchids can lead to yellowing leaves as it causes root rot. When soil stays constantly wet, roots lack oxygen, and nutrient uptake is hindered. To prevent overwatering, ensure proper drainage in the orchid’s pot and allow the growing medium to partially dry between waterings.
Monitor the moisture level and adjust watering frequency accordingly. Yellowing leaves may signal waterlogged roots; hence, maintaining a balanced watering routine is crucial for the overall health of your orchid.
Underwatering
Underwatering can cause orchid leaves to turn yellow due to stress from insufficient moisture. Orchids need consistent, yet moderate watering to thrive. When the growing medium becomes too dry, the plant’s water balance is disrupted, impacting its overall health. To address underwatering, establish a regular watering schedule, ensuring the orchid’s roots receive adequate hydration.
Pay attention to the specific moisture needs of your orchid species and adjust watering frequency accordingly. By maintaining a proper balance of moisture in the growing medium, you can help prevent yellowing leaves and promote the well-being of your orchid.
Poor Drainage
Inadequate drainage is a common cause of yellowing orchid leaves. Orchids are vulnerable to root rot when their growing medium retains excess water. Insufficient drainage prevents proper aeration, leading to oxygen deprivation and nutrient absorption issues in the roots.
To address poor drainage, use a well-aerated orchid mix that includes materials like bark or perlite. Ensure that the orchid’s pot has drainage holes, allowing excess water to escape.
Regularly inspect the growing medium’s moisture level and adjust watering practices to prevent waterlogged conditions. Improved drainage supports a healthier root system and reduces the risk of yellowing leaves in orchids.
Nutrient Deficiency
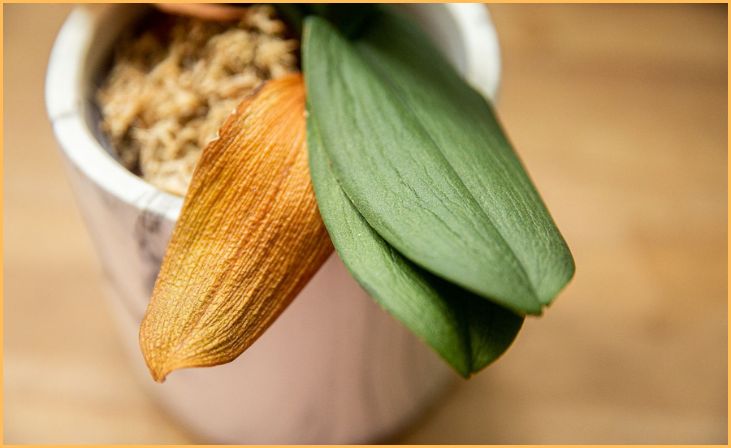
Yellowing orchid leaves may indicate nutrient deficiencies. Orchids, often growing in nutrient-poor environments, can lack essential elements like nitrogen, magnesium, or iron. To address this, use a balanced orchid fertilizer, following recommended dosages on the label. Regularly fertilize during the orchid’s active growth periods, typically spring and summer.
Be cautious not to over-fertilize, as this can harm the plant. Monitor the orchid for signs of improved leaf color and overall health. Proper nutrition ensures vibrant foliage and robust flowering, contributing to the overall well-being of the orchid.
Also, Read – Reasons to Visit New Jersey
Poor Light Conditions
Yellowing orchid leaves may result from poor light conditions. Orchids require the right amount of light for optimal growth. Insufficient light can hinder photosynthesis, leading to weakened plants and yellowing leaves.
Assess your orchid’s species-specific light requirements and place it in an appropriate location. Inadequate light often occurs in dimly lit areas or when orchids are shielded from natural light sources.
Adjust the placement to provide bright, indirect light, avoiding direct sunlight, which can scorch the leaves. Adequate light is crucial for orchid health, promoting robust foliage and vibrant blooms. Regularly monitor your orchid’s light exposure to prevent yellowing and ensure optimal growth.
Disease or Pest Infestation
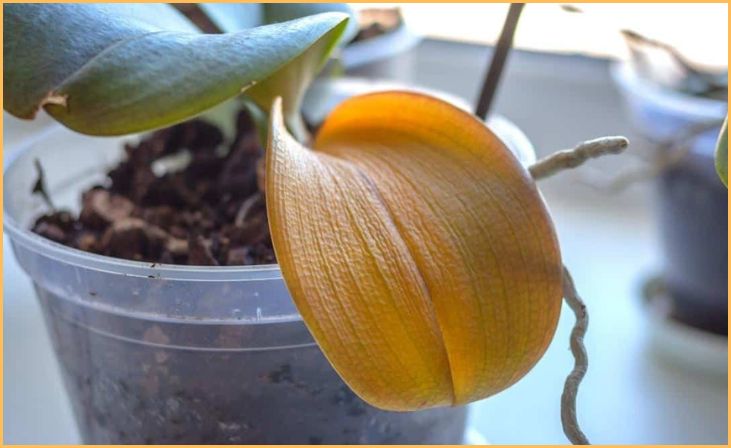
Yellowing orchid leaves may signal disease or pest infestation. Regularly inspect both leaves and roots for signs of pests like mealybugs or spider mites. Fungal or bacterial infections can also lead to discoloration.
If pests are present, treat with appropriate insecticidal soap or neem oil. For diseases, adjust environmental conditions to discourage their growth, ensuring proper ventilation. Remove affected leaves or sections carefully and consider using a fungicide if necessary.
Quarantine newly acquired orchids to prevent introducing pests. Swift identification and targeted intervention are crucial to safeguarding orchids from diseases and pests, preserving their overall health and appearance.
Steps to Revive Yellowing Orchid Leaves
Reviving yellowing orchid leaves involves a combination of corrective measures to address the specific underlying issues causing the discoloration. Here are steps you can take to revive yellowing orchid leaves:
- Assess the Orchid’s Environment:
- Evaluate the orchid’s current growing conditions, including light exposure, temperature, and humidity. Ensure that these factors are within the optimal range for the specific orchid species.
- Examine Watering Practices:
- Check the moisture level of the growing medium. Yellowing leaves can result from both overwatering and underwatering.
- Adjust the watering frequency to provide a consistent level of moisture. Allow the growing medium to dry slightly between waterings.
- Inspect the Roots:
- Carefully remove the orchid from its pot and inspect the roots. Healthy roots are firm and white or green, while rotting roots are brown and mushy.
- Trim away any rotting or dead roots using sterile cutting tools.
- Repot the Orchid:
- If root rot is present, consider repotting the orchid in fresh, well-draining orchid mix. Use a pot with adequate drainage holes to prevent waterlogging.
- Gently remove old potting mix from the roots and replace it with a suitable orchid potting mix.
- Evaluate Light Conditions:
- Ensure that the orchid is receiving the appropriate amount of light. Most orchids thrive in bright, indirect light.
- Avoid exposing orchids to direct sunlight for prolonged periods, as this can lead to leaf damage.
- Address Nutrient Deficiencies:
- Feed the orchid with a balanced orchid fertilizer, following the recommended dosage on the product label.
- If yellowing is due to a specific nutrient deficiency, choose a fertilizer formulated for orchids that addresses the lacking nutrients.
- Monitor for Pests and Diseases:
- Inspect the orchid for signs of pests such as aphids, spider mites, or scale insects. Treat any infestations promptly with appropriate measures.
- Watch for symptoms of fungal or bacterial infections and take necessary steps to address them.
- Maintain Optimal Humidity:
- Orchids often thrive in higher humidity levels. Consider placing a tray of water or using a humidifier to maintain adequate humidity around the orchid.
- Continue Regular Care:
- Establish a consistent care routine for your orchid, including regular watering, fertilizing, and monitoring for any signs of stress or disease.
- Be Patient:
- Reviving orchids takes time, and it may take several weeks to see improvements. Be patient and consistent in your care efforts.
Conclusion
In conclusion, revitalizing yellowing orchid leaves requires a holistic approach. By adjusting watering practices, ensuring optimal light exposure, repotting when necessary, addressing nutrient deficiencies, and maintaining a vigilant care routine, orchids can recover. Patience is crucial, as improvements may take time. Emphasizing proactive care measures is essential for preventing future issues and fostering the long-term health and vibrancy of orchids.
FAQs
Carefully observe the plant, check the growing medium for moisture levels, inspect roots for rot, and assess light conditions. Conduct soil and water tests for nutrient deficiencies to pinpoint the issue.
Yes, overwatering is a common cause of yellowing orchid leaves. It leads to root rot, restricting the plant’s ability to absorb nutrients and causing leaves to turn yellow.
If you suspect root rot, carefully remove the orchid from its pot, trim away affected roots, and repot it in fresh, well-draining orchid mix. Adjust watering practices to prevent future occurrences.

