Are you tired of dull, frizzy hair that just won’t cooperate? Do you dream of having salon-worthy, smooth, and shiny locks? Look no further because we have the solution for you – a DIY keratin treatment that will transform your hair from drab to fab right in the comfort of your own home.
In this blog post, we will guide you through the process of achieving salon-quality hair with a DIY keratin treatment. We will provide you with step-by-step instructions, tips, and tricks to ensure that you get the best results possible.
So, let’s dive in and discover how you can unleash the full potential of your hair with this amazing DIY treatment!
Step-bt-Step DIY Keratin Treatment Instructions
While salons offer professional services, the convenience and cost-effectiveness of a home treatment make it an appealing option. In this blog post, we’ll delve into the world of DIY Keratin Treatment, guiding you through the process to help you attain sleek and silky hair in the comfort of your home.
Choosing the Right Keratin Treatment

Embarking on your DIY keratin journey starts with a crucial step: selecting the right at-home treatment. Opt for products specifically formulated for DIY use, ensuring they contain natural ingredients. Take the time to research various brands, delving into reviews to guarantee you choose a high-quality product. The effectiveness of the treatment hinges on compatibility with your unique hair type and specific needs.
Look for formulations that prioritize nourishment and repair, enhancing the overall health of your hair. By making an informed choice, you set the foundation for a successful at-home keratin treatment, fostering the prospect of achieving salon-worthy results in the comfort of your own space.
Quick Link: Taming the Frizz: 6 Natural Remedies for Silky, Smooth Hair
Prepping Your Hair for the Treatment
Initiating your keratin treatment adventure requires meticulous hair preparation. Begin by employing a clarifying shampoo to eliminate any residual product buildup and gently open up your hair cuticles. This preliminary step is pivotal as it sets the stage for the keratin treatment, enabling it to seamlessly penetrate your hair strands. The clarifying shampoo acts as a reset button, ensuring a clean canvas for the treatment to work its magic.
By eliminating impurities, you enhance the treatment’s effectiveness, paving the way for optimal and long-lasting results. Embrace this foundational step in your pre-treatment routine to maximize the transformative potential of the keratin infusion, ultimately leaving your hair sleek, frizz-free, and revitalized.
Drying Your Hair Properly
Before delving into the keratin treatment application, the crucial prelude involves thorough hair drying. Take the time to blow-dry your hair meticulously until it reaches a state of complete dryness. This step is paramount as the keratin treatment exhibits optimal efficacy on dry hair. Ensuring absolute dryness is essential to prevent any residual moisture from interfering with the seamless application and absorption of the keratin formula.
By eliminating moisture, you create an ideal environment for the treatment to bond effectively with your hair, maximizing its transformative potential. Embrace the art of precision in the drying process, setting the stage for a successful keratin treatment that promises to leave your locks smooth, lustrous, and impeccably frizz-free.
Applying the Keratin Treatment

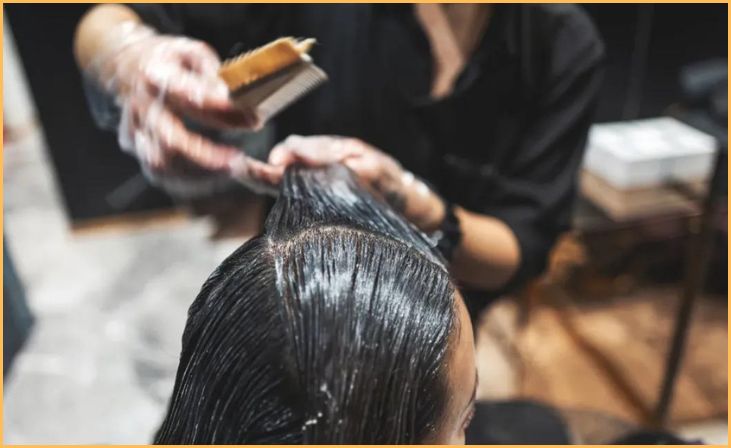
As you embark on the application phase of your keratin treatment, precision is key. Begin by dividing your hair into manageable sections, laying the groundwork for an even and thorough application. From roots to ends, methodically apply the keratin treatment, using either a comb or brush to coat each strand meticulously. The goal is to guarantee that every inch of your hair receives an equal dose of the treatment, ensuring consistent results across your entire mane.
This meticulous approach not only maximizes the product’s effectiveness but also contributes to the overall smoothness and uniformity of the treatment. By taking the time to coat each strand comprehensively, you set the stage for a transformative experience that promises to leave your hair impeccably sleek and beautifully rejuvenated.
Letting the Magic Happen
Once you’ve meticulously applied the keratin treatment, the next crucial step is to exercise patience during the specified waiting period. This time frame is not just a formality but a critical phase in the process, enabling the treatment to form a potent bond with your hair. The waiting period facilitates the creation of a protective layer that becomes a formidable defense against frizz while simultaneously elevating the natural shine of your locks. Embrace this moment as an investment in the transformative potential of the keratin treatment.
The bond forged during this interval is integral to the treatment’s long-lasting effects, ensuring your hair emerges not just smoother but fortified with a radiant, frizz-resistant allure. Allow time to be your ally, and you’ll reap the rewards of a keratin-infused mane that exudes health and vibrancy.
Also Read: Top 6 Hair Care Solutions for 2023: Your Guide to Gorgeous Hair
Sealing the Treatment for Optimal Results
As the designated waiting time concludes, the pivotal moment to seal the keratin treatment for optimal results arrives. Employ a flat iron at the recommended temperature to lock in the transformative effects into your hair strands. Start at the roots and systematically work your way down, ironing small sections of hair with precision. This sealing process is essential, as it not only enhances the longevity of the treatment but also ensures even distribution across your entire mane.
The flat iron acts as the final touch, solidifying the bond between the keratin and your hair, resulting in a sleek and polished finish. Paying attention to each section guarantees that the treatment is effectively sealed, promising a radiant, frizz-free outcome that reflects the meticulous effort invested in your DIY keratin journey.
Following Post-Treatment Care

The success of your DIY keratin treatment extends beyond the application process—adhering to post-treatment care instructions is paramount. Take heed of the guidelines provided with your chosen product, which may encompass refraining from shampooing for a specified period. Opt for sulfate-free shampoos and conditioners to maintain the treatment’s integrity, promoting prolonged smoothness and manageability. Additionally, limit heat styling to preserve the effects of the treatment, allowing your hair to revel in the newfound vitality.
These post-treatment measures play a pivotal role in ensuring the longevity of the keratin infusion, enabling you to savor the benefits of salon-quality hair for an extended period. Embrace the commitment to care, and your DIY keratin journey will culminate in a tress transformation that stands the test of time.
Bottom Line
In conclusion, a DIY keratin treatment can be a game-changer for your hair. By following the steps outlined in this blog post, you can achieve salon-quality results without breaking the bank. Say goodbye to frizz, dullness, and unmanageable hair and hello to smooth, shiny locks that will turn heads wherever you go.
Remember, consistency is key when it comes to the longevity of your results. Treat your hair with care, use sulfate-free products, and follow up with regular maintenance treatments to keep your hair looking its best.
Now that you have all the information you need, it’s time to embark on your DIY keratin treatment journey. Get ready to transform your hair and boost your confidence like never before!
FAQs
The longevity of a DIY Keratin Treatment varies, but on average, you can expect results to last around 2 to 3 months. Factors such as hair type, maintenance, and the specific product used can influence the duration.
It’s advisable to color your hair before the Keratin Treatment. Coloring afterward may affect the treatment’s efficacy. However, always check the specific instructions of the products you’re using, as some may have different recommendations.
While DIY Keratin Treatments are generally suitable for most hair types, it’s crucial to consider your hair’s condition and health. Individuals with extremely damaged or overly processed hair should consult with a professional before attempting a treatment at home.
It’s recommended to wait at least 8 to 10 weeks between DIY Keratin Treatments. Frequent treatments can lead to an excessive buildup of keratin, potentially causing hair damage. Always prioritize the health of your hair and follow the instructions provided by the product.


