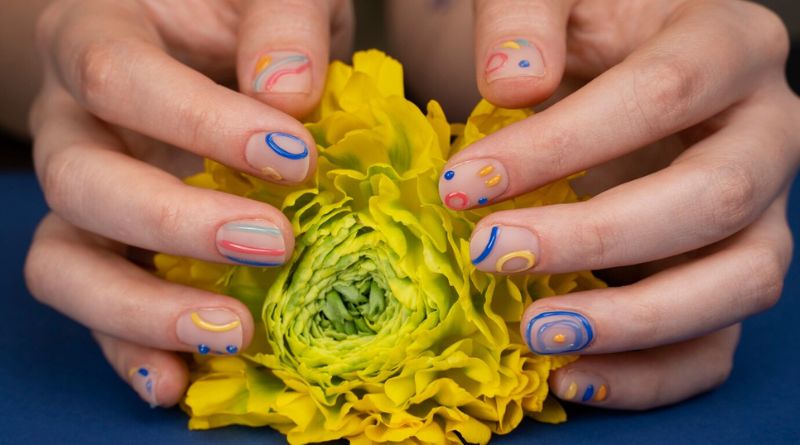
Nail art is not just a form of self-expression; it’s a vibrant canvas waiting for you to explore your creativity. Whether you’re an absolute beginner or someone looking to enhance their nail art skills, this guide is tailored just for you.
In the world of nail art designs for beginners, the possibilities are endless. With the right tools, techniques, and a dash of inspiration, you can transform your nails into miniature works of art.
This comprehensive guide will walk you through everything you need to know, from the essential tools and basic techniques to step-by-step tutorials and troubleshooting tips. Whether you’re aiming for chic elegance, playful polka dots, or intricate florals, we’ve got you covered.
Get ready to embark on a colorful journey into the realm of nail art. We’ll help you unlock your inner artist and achieve stunning nail designs that will leave everyone asking, “How did you do that?” Let’s dive in and make your nail art dreams a reality.
Nail Art Basics

Before you dive into the world of captivating nail art designs, it’s crucial to get a solid grasp of the fundamentals. Nail art for beginners may seem intimidating at first, but with the right knowledge and tools, you’ll be well on your way to creating beautiful designs. In this section, we’ll cover the essential nail art basics to set a strong foundation for your creative journey.
Also, Read – Nail Trends: Embrace Freshness and Creativity
A. Tools and Supplies for Beginners
Nail art requires specific tools and supplies to bring your designs to life. Here’s a list of must-have items to get started:
- Nail Polish: An array of nail polish colors is your palette. Start with a variety of shades, including your favorite base colors and a collection of nail art-specific polishes.
- Nail Brushes: Invest in a set of nail art brushes with varying tip sizes for precision in your designs.
- Nail Art Pens: These pens come with fine tips, making it easier to draw intricate designs and patterns.
- Nail Striping Tape: Essential for creating clean, straight lines in your nail art.
- Nail Dotting Tools: You can make perfect dots and elaborate details with the help of these tools.
- Top and Base Coat: Ensure your designs last longer by using a quality top and base coat.
B. Preparing Your Nails
Before you start painting your nails, it’s crucial to prepare them properly:
- Clean and Trim: Remove any old nail polish, dirt, or oils from your nails. Trim your nails to your desired length.
- Shape Your Nails: Shape your nails with a nail file. Almond, square, oval, and round are typical shapes.
- Buffing smooths the surface of your nails, ensuring a clean canvas for your designs. File away any rough edges.
- Push back your cuticles gently using a cuticle pusher or an orange stuff and File:
- Cuticle Care:ck. Avoid cutting them, as this can lead to infection.
C. Nail Art Safety Tips
Safety should always be a priority when working with nail products:
- Proper Ventilation: Ensure you’re working in a well-ventilated area or use a nail fan to avoid inhaling fumes from nail polish and nail polish remover.
- Allergic Reactions: Be aware of any allergies you may have to nail products. Test new products on a small area first to check for reactions.
- Nail Polish Storage: Keep your nail polishes tightly closed and store them in a cool, dry place away from direct sunlight to prevent them from drying out or thickening.
Also, Read – Nail Art Designs For Beginners
Nail Art Designs For Beginners
Classic French Manicure

A classic French manicure is an elegant nail design suitable for beginners. Start with a clear base coat. Then, paint the tips of your nails with a soft white or pastel color. The key is to create a clean, even line.
You can use nail guides or simply paint them carefully. Finish with a clear topcoat to seal the design and add shine.
This timeless and minimalistic look enhances the natural beauty of your nails, making them appear longer and more refined. It’s perfect for various occasions and complements any outfit with its timeless charm.
Polka Dots
Polka dot nail art is a playful and easy design for beginners.Apply a base coat first to shield your nails. Choose a background color and paint your nails with it.
After it dries, take a toothpick, a dotting tool, or the end of a bobby pin, and dip it into a contrasting nail polish color. Carefully create evenly spaced dots on your nails.
You can arrange them in rows or create a random pattern, depending on your preference. After the dots have completely dried, use a clear topcoat to protect the design and give it a glossy appearance. This cheerful and versatile design is great for adding a pop of color to your look.
Stripes
Creating striped nail art is a chic and straightforward option for beginners. Apply a base coat first to shield your nails. Once it’s dry, select your desired nail polish colors.
Using striping tape, available in most nail art kits, or a thin nail art brush, carefully paint straight lines on your nails. You can go for horizontal, vertical, or diagonal stripes, depending on your preference.
Allow the stripes to dry thoroughly before applying a clear topcoat to seal the design and provide a polished finish. Striped nails offer a clean and modern aesthetic that can easily complement various outfits and occasions. Experiment with different color combinations for a stylish look.
Also, Read – Tips For Stronger Nails
Ombre Nails
Achieving ombre nails is a trendy and beginner-friendly nail art technique. Start with a clear base coat to protect your nails. Choose two complementary nail polish colors, one lighter and one darker.
Paint your nails with the lighter color as the base coat and let it dry completely. Then, take a makeup sponge or a wedge and paint both chosen colors side by side onto the sponge.
Gently dab the sponge onto your nails in a tapping motion, starting at the middle and moving towards the tips. Repeat this step until you achieve the desired ombre effect.
Clean up any excess polish around your nails with a brush or cotton swab dipped in nail polish remover. Finish with a clear topcoat for a smooth and blended finish. Ombre nails offer a subtle gradient effect that’s both stylish and versatile.
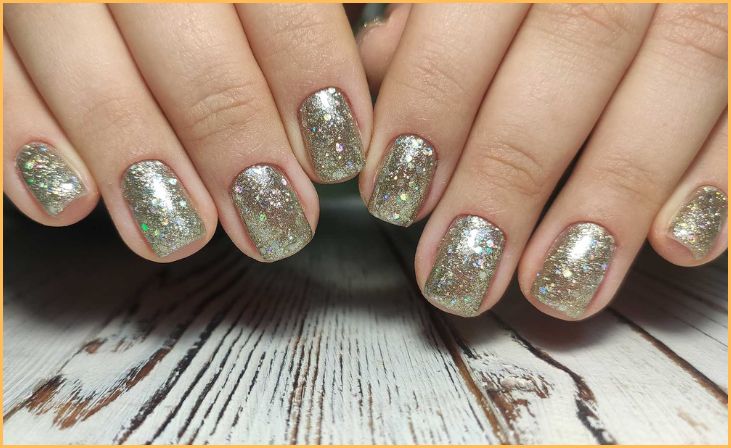
Glitter Gradient

Creating a glitter gradient on your nails is a glamorous and beginner-friendly nail art technique. Apply a clear base coat first to shield your nails. Choose a glitter nail polish color that you’d like for your gradient.
Paint your nails with this glitter polish, but focus more on the tips and gradually fade the polish toward the base of your nails. You can achieve this by applying less pressure with each brushstroke as you move towards the base.
Allow the glitter polish to dry between layers if needed. Finish with a clear topcoat to secure the glitter in place and give your nails a dazzling finish.
Glitter gradients add a touch of sparkle and sophistication to your nails, making them perfect for special occasions or when you want to add some extra flair to your everyday look.
Water Marble Nails
Creating water marble nails is a mesmerizing nail art technique suitable for beginners. Apply a base coat first to shield your nails. Choose a selection of nail polish colors that you want to use for your design.
Fill a cup with room-temperature water and, one by one, drop small amounts of nail polish into the water’s surface. The colors will spread and create unique patterns. To create the pattern you choose, gently swirl the colors together with a toothpick.
Then, dip your nail into the water, allowing the design to adhere to your nail. Use the toothpick to gently scrape away any extra polish from the water’s surface.
Once dry, clean up around your nails with nail polish remover, and finish with a clear topcoat to seal the design. Water marble nails result in captivating, one-of-a-kind patterns that are sure to grab attention.
Also, Read – Nail Art Delight
Flower Nail Art
Creating flower nail art is a charming and beginner-friendly design option. To preserve your nails, start by applying a clear base coat. Choose a background color that complements your flower design; pastels work well.
Create flower petals by dotting or using a little nail art brush to apply various colors. Start with a central dot for the flower’s center and then add petals around it. You can use contrasting or complementary colors for a vibrant or subtle look, respectively.
Finish your flower nail art with green stems and leaves. Allow the design to dry thoroughly before applying a clear topcoat to protect and add shine. Flower nail art is perfect for adding a touch of nature-inspired beauty to your manicure, and it’s versatile for various occasions and seasons.
Fruit Nail Art
Fruit nail art is a playful and beginner-friendly design that adds a pop of fun to your nails. To protect your nails, start with a base coat that is transparent. Choose a background color, like a bright or pastel shade, that complements the fruits you want to depict.
Using a fine nail art brush or dotting tool, paint cute fruit designs like lemons, cherries, watermelons, or strawberries on your nails. Add details like seeds, leaves, or stems to make them look realistic.
Before using a clear topcoat to seal and shield your fruit nail art, let the designs completely dry. This cheerful and whimsical nail art is perfect for adding a touch of summer or tropical vibes to your manicure.
Animal Print
Animal print nail art is a stylish and beginner-friendly design choice. Begin with a clear base coat to protect your nails. Choose a background color; neutral shades work well for animal prints.
Create animal-inspired designs like zebra or leopard stripes with a fine nail art brush or a dotting tool. For leopard spots, make irregular clusters of small dots. For zebra stripes, paint thin, parallel lines.
To suit your style, try out various colors for the spots or stripes. Allow your animal print design to dry completely before applying a clear topcoat to seal and enhance the look. Animal print nail art adds a touch of wild and fashionable flair to your manicure, perfect for various occasions and outfits.
Geometric Nail Art

Geometric nail art is a modern and beginner-friendly design choice. Start with a clear base coat to protect your nails. Choose a background color, and once it’s dry, use striping tape or nail stencils to create geometric shapes like triangles, squares, or diamonds on your nails.
Paint each shape with a different color or keep them uniform for a cohesive look. Carefully remove the tape or stencils while the polish is still wet to reveal clean lines.
Prior painting adding a clear lacquer to seal and polish the design, let it completely dry. Geometric nail art offers a sleek and contemporary style that can complement a variety of outfits and nail lengths.
Also, Read – Acrylic Nail Kits for Beginners
Conclusion
Congratulations! You’ve just embarked on an exciting journey into the world of nail art. With the fundamental knowledge of tools, techniques, and these step-by-step tutorials, you’re now equipped to create stunning nail art designs for beginners.
Remember, practice makes perfect, so don’t be discouraged by initial imperfections. Nail art is not just a hobby; it’s a form of self-expression and a canvas for your creativity.
So, unleash your inner artist, experiment with different styles, and let your nails tell your unique story through captivating designs. Enjoy your nail art adventure!
FAQs
Nail art essentials include nail polish, brushes, dotting tools, striping tape, and top and base coats. These tools form the foundation for creating stunning nail art designs.
Make sure each layer of nail polish is completely dried before adding the next to avoid smearing. You can also use a quick-dry top coat to speed up the drying process.
Properly prep your nails by cleaning and buffing them, and always apply a top coat to seal your design. Also, avoid excessive exposure to water and harsh chemicals, which can cause chipping.


